If you are looking for images of dudes doing radical things on bicycles, sorry, nothing here - yet.
BMX page Summary
If you interested in bicycles, looking for a new sport (do your knees hurt?), want some low-hype information on BMX racing, read on!
Introduction to BMX
Getting Started
Spending some money
You're a racing fool!
Moving-up proficiency levels and Sponsorship.
How to get quicker.
How to win races.
Starts, or "How to become a Leader."
Jumps
Turns
Bike Setup
Disclaimer:
Introduction to BMX.
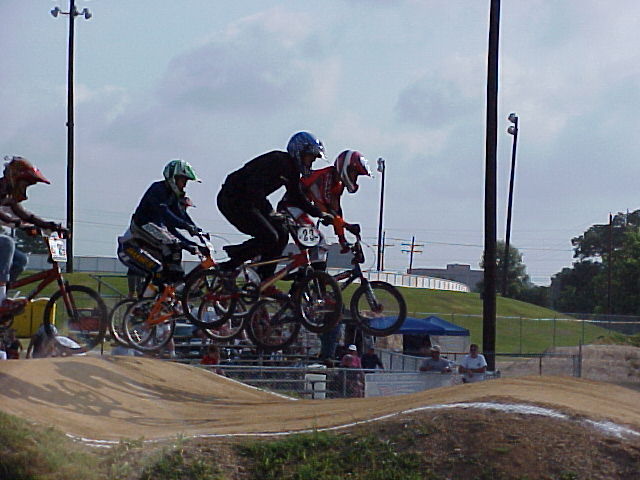
If you have not tried riding on a BMX track, you are missing something!
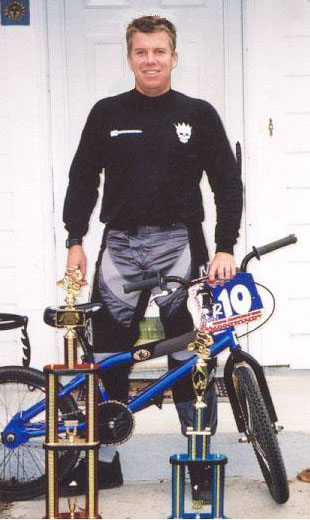
My son Ty and I began riding on our local track in Peachtree City, Georgia in 2001 and registered in March 2002 to race the NBL 2002 season as Rookies.
(external link to Peachtree City BMX Official site)
Ty is racing in the 7 year old class, and Dad in the 17+ class.
We plan to only race in the state of Georgia in 2002, and have 3 goals this 2002 season.
- Race to win, but have fun. (no giving-up, no tracking points and no pressure - hey, we're Rookies!)
- Learn the proper techniques and gain racing experience.
- Learn to maintain our bikes.
This sport will teach you (or your child) what I think is one of the great lessons-of-life, how to win and lose.
Our education systems (and many team sports) place our children in a grey, sterile world where everyone is a winner and there are no losers, and no-one should keep the score.
Getting started. 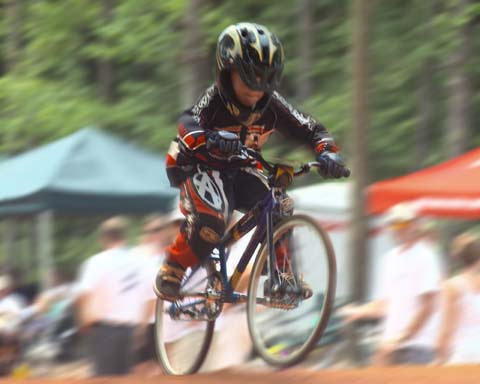 Everyone gets an "A" grade and the inflated self-esteem is unchallenged.
This manifests itself in the "victim mentality" where if a person does not perform at certain level, it was someone else's fault and the individual is not responsible for their decisions and actions.
Morality has been subverted into a fluffy something based on the individuals feelings.
The reality is that in life there really are winners and losers, you lose your job, you win a sales contract, you need to develop skills to handle these experiences!
Life is not always fair, you need to be able to handle that too!
You need to practice winning graciously (and savour the moment) and accept the agony of defeat.
When you suffer a setback, you have to learn to honestly analyse what happened and why, and make adjustments so that your next attempt will yield more favorable results.
BMX racing provides you with honest feedback in the form of ego-adjusting results.
Everyone gets an "A" grade and the inflated self-esteem is unchallenged.
This manifests itself in the "victim mentality" where if a person does not perform at certain level, it was someone else's fault and the individual is not responsible for their decisions and actions.
Morality has been subverted into a fluffy something based on the individuals feelings.
The reality is that in life there really are winners and losers, you lose your job, you win a sales contract, you need to develop skills to handle these experiences!
Life is not always fair, you need to be able to handle that too!
You need to practice winning graciously (and savour the moment) and accept the agony of defeat.
When you suffer a setback, you have to learn to honestly analyse what happened and why, and make adjustments so that your next attempt will yield more favorable results.
BMX racing provides you with honest feedback in the form of ego-adjusting results.
Take your rusty steed down to your local BMX track and take a couple of laps at a slow pace.
Your bike should be mechanically sound, with at least one effective brake, you should wear shoes and a helmet. (Note: this is the bare minimum of protective gear.)
Get a feel for how the bike reacts when you ride up and down the hills and jumps.
Keep your pedals level as you roll over the peaks of the jumps and hills.
As you start to get more adventurous and pedal harder, the jumps may cause you to get a little "air".
If you like skiing and other action sports, you are probably hooked by now!
You now need to lower your seat so that your butt does not touch the seat when you bend your knees to "give" to the launching force of the jumps.
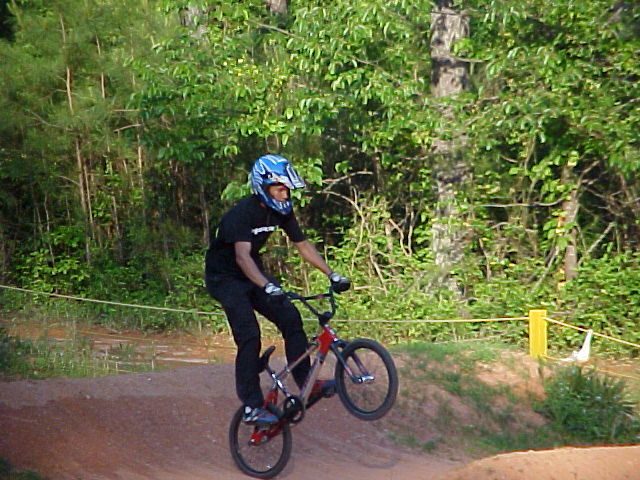
Spending some money.  You will notice that you have to hit a ramp a lot faster to get "air" - this is good!
You are using your legs as suspension and are getting comfortable with the sensation of "sucking up the bumps."
Click on the image on the right to see a rookie in action!
At this point you have probably realised that your mountain-bike is not the ideal weapon for zipping around the track.
You have been to the track quite a few times and have met some of the locals, start asking them about their bikes and the local bike shops.
You will notice that you have to hit a ramp a lot faster to get "air" - this is good!
You are using your legs as suspension and are getting comfortable with the sensation of "sucking up the bumps."
Click on the image on the right to see a rookie in action!
At this point you have probably realised that your mountain-bike is not the ideal weapon for zipping around the track.
You have been to the track quite a few times and have met some of the locals, start asking them about their bikes and the local bike shops.
Some soul searching is required here, "How much do you want to spend?"
(How much have you got?)
You need to get a bike designed for BMX, that also fits your weight and height.
If you have the slightest premonition that you are going to go racing, or start jumping, within the next year, the discount store bike is going to cost you in terms of bent and broken parts - and loss of confidence in your equipment.
A light, thin-tyred (thin-tired for those speaking American) BMX bike for kids under 90 pounds starts at about $200 and is a huge performance enhancer for junior.
Heavier riders should probably get a standard "20 inch" bike, they start at about $150.
Dads (and Mums) have another decision to make, "Cruiser or 20 inch?"
Here we go again, I personally think that you have a better chance of learning the correct riding techniques on the 20" bike, but there again, the cruiser is more stable and forgiving, and seems to suit the heavier rider.
Try riding as many different bikes as you can before writing the check.
Specialist bicycle shops usually have very knowledgable staff/riders who can help you make your choice. Save some cash for a full-face helmet (if you don't have one.)
The "safety" factor converts to more enjoyable riding, and if you ever land on your face, your Orthodontist won't have to interrupt your visit to order himself a new BMW!
You're a racing fool!
You are having a love-affair with your BMX bike (so my wife tells me!), the honeymoon is over and you and your bike are very comfortable together.
You've lost some weight and you are getting some muscle tone.
When you are not thinking about sex, you are imagining yourself doing the perfect lap.
Your competitive juices begin to flow and you need to know if you really are as fast as you feel.
You consider yourself one of the locals, and have heard the question, "When are you going to start RACING?" many times.
Somewhere along the line you commit to the next local race, time to head back to your friendly bike shop to get some additional safety gear that is required for organised racing.
This is a basic list: Closed shoes, long pants (blue jeans will work), long-sleeve shirt, helmet (full-face or attached mouthguard) and padding on your bike top-tube, cross-bar and gooseneck.
Bear in mind, it can vary from track to track, and organisation to organisation.
Moving-up proficiency levels and Sponsorship.
NBL:
(external link to National Bicycle League Official site)
ABA:
(external link to American Bicycle Association Official site)
You also need to identify some goals for that racing season, discuss them with your family.
The time commitment and financial issues may cause you scale down to local races only.
Racing is where you learn to perform under pressure, this is where you learn how to win races.
To consistently win races requires more than just speed, you have to maneuver in traffic, get good starts, and have a positive mental attitude.
BMX racing has been set up to cater for all riding skill levels and within these levels, age groups. The Class you compete in is determined by a combination of your birth date and proficiency level. Most riders start out their first season at the "Rookie" level and only move up to "Novice" a year or 2 later. If you are winning all your races and feel you would have better competition at the next level, you can elect to move up, or based on rules you are racing under, you may accumulate enough "move-up" points to be involuntarily promoted. The 2 highest proficiency levels are "Expert" and "Pro". At the "Pro" level, BMX racing is your day job and hopefully you have a solid sponsor base to support your travelling expenses, bike equipment and a regular haircut.
Sponsors, as in all sports, reward results (consistently placing in every race,) but are also looking for good ambassadors to the sport of BMX, as well as riders who present the sponsors products in a positive light.
I think one of the easiest ways to get sponsored is get on a team (or start up your own team) racing the state qualifier program.
Team sponsorship is generally limited to a discount on parts.
However, the good thing about this is that the sponsor will have a list of riders names and one of those will be yours!
You have an introduction to a sponsor, now all you have to do is go out and win races!
How to get quicker.
- I have found BMX instructional videos to be very helpful. When I started racing, I could not balance on the pedals on the starting gate. Many riders tried to help me with what worked for them. I just couldn't get it and had to do one-foot-on-a-pedal starts for the first 4 races. I bought the Colin Stiles video in which he instructs you to "turn" your handlebars as if steering down the road, to keep your balance. Bingo, a light bulb flashed and the following gate practice I was balancing like a pro.
- There is a lot information on the Internet.
Here are some sites that I found helpful:
(external link to Jim Boswell's BMX Basics) - Has anyone tried to find an instructional book on BMX in the library or bookstore? Good luck, I can't find anything written in the last 5 years.
- Clinics presented by Pros.
- Get someone to videotape you on the track (especially your starts.)
- Mental focus, Get in the zone.
- Practice, practice, practice.
- Cross-train, run, gym, squats
- Race to accumulate experience
- Set your bike up correctly
How to win races.
10 Critical Skills to work on:
Starts, or "How to become a Leader."
01) Starts
02) Starts
03) Starts
04) Starts
05) Starts
06) Starts
07) Starts
08) Manualling
09) Jumping
10) Cornering
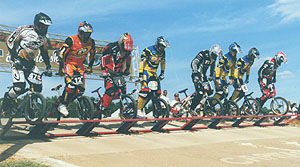
Why starts are so important
In the 100 yard sprint, the start is the most important part of the race.
When you have two athletes with identical speed and endurance, the one who gets out of the starting blocks first should win.
In BMX, this is especially true as the leader dictates (dominates) the race and the followers are forced to react (and change their plans.)
If you are leading and anyone falls or gets squirrelly, you don't have to take avoiding action (and lose time), there is just wide open track in front of you and you can continue riding the track as you planned and practiced!
So the sooner you get into the lead, the sooner you can pick the quickest lines and concentrate on extending your lead.
Starting gate operation.
Stand 10 feet behind the gate and watch the gate release.
Does it "fall" relatively slowly, or does it slam down quickly?
Now watch the gate and the lights, you should be able to tell on which of the four lights the gate begins to move.
You should now have an idea of when to initiate your "snap" and associate it to one of the lights.
If you prefer to look at the gate when you start, get close to the gate and observe which beep the gate begins to move.
Get on the gate and fine-tune your start!
Starting gate checklist
Position your bike so that it points straight down the track (front wheel and bike frame.)
Balance on the pedals with the pedals level (or close to level), pedal corresponding to your dominant leg should be the the forward position.
When gate sequence starts, rise off seat to where front knee is still slightly bent, move your hips back so that you can see at least half of the bike seat between your legs.
Focus on the gate (or the lights) and listen to the recorded starter message so that you are prepared for your launch cue.
Mechanics of the "Snap".
Simultaneously step on the front pedal as you throw your hips forwards, pulling against the handlebars.
The overall effect is that your bike does not move backwards as your hips move forward.
As your hips near the handlebars, the gate should have begun falling and the downward pressure on the front pedal will convert from holding your bike in place to forward motion.
Pedal as hard as possible, pulling against the handlebars (almost a bracing action.)
This explosive pedalling may cause the front wheel to lift off the ground, that's okay - as long as you are not "pulling up" to lift the front wheel.
Starting Violations. (NBL rule# 15.3)
A race will be recalled and restarted if, in the opinion of the starter or other official acting as gate monitor, one or more of its participants gains an unfair advantage over the others by jumping or slingshotting the starting gate.
Any rider who is officially determined to have committed either of these starting violations will be excluded from the restart and will be scored as having finished last in the race.
A rider jumps the gate when he anticipates the start allowing the front wheel of his bicycle to move forward over the gate prior to its release by the starter.
A rider slingshots the gate when he anticipates the start from a position behind the gate so that his bicycle is already moving forward at the time of the gates release.
Only boys age 6 and under and girls age 7 and under may be assisted in balancing their bicycles on the gate by another person, whose hands may not be in contact with either the rider or the bicycle once the starters sequence has begun.
A rider who starts a race from a gate position other than that assigned to him will be scored in last place regardless of his actual finish position if another rider in the race protests the offense.
Jumping.
Todays tracks are jump and bump infested mini-supercross tracks. Most tracks will feature varying combinations of step-ups, step-downs, doubles, tabletops and rhythm sections to challenge the riders - and woo the spectators. The "speedjump" is the showiest (and generally quickest) way to navigate 2 or 3 jumps/humps and uses the first uphill slope to launch you and your bike into the air and smoothly land on the downside of another bump/hump. However, under race conditions you may not have the speed to "clear" the gap (due to traffic or the obstacles preceding the jump) and so you need to be able to ride through the jumps using the compress and the lift techniques. Remember, most jumps are more rideable than you would think, and it may be quicker to ride through an obstacle than clear it.
Speedjumping.
At the base of the jump pull up on your bars and move your weight forward a bit, just as your front wheel starts to clear the lip push down on your bars and move your weight back towards your rear wheel.
When your butt is past your seat your back wheel should be leaving the lip.
By pushing your front end down and moving your weight back, your bike will stay a lot lower over the double and you will spend a lot less time in the air.
This is not easy to do and but with practice, the more natural (and enjoyable) "flying" will become.
Compressing or rolling jumps
The Compress technique is the easiest but the slowest of the 3 methods of navigating jumps.
To Compress a jump, ride straight at it, stop pedalling about one bike length before the beginning of the up slope.
As the front wheel rides up the slope of the jump, slowly bend your elbows (absorbing the additional upward force.)
By the time you reach the top of the jump, your elbows will be fully bent and your head will be close to the handlebars.
As the rear wheel comes up the slope of the jump, bend your knees and absorb the additional upward force.
As your front wheel passes the top of the jump, straighten your elbows and "push" the handlebars away from you.
When your rear wheel passes the top of the jump, straighten your legs and begin pedalling as you ride away from the jump.
Pushing down on the back side of each hump (pumping) will speed you up and extend your arms again in preparation for the following hump.
Lifting or power-manualling jumps
The Lift (also called the power manual) is faster than the Compress, and under certain conditions, can be quicker than jumping a set of obstacles (especially rhythm sections.)
To Lift a jump, ride hard up to the jump, pick up your front wheel up about half a bike length away from the up slope of the jump.
The height you lift the front wheel is determined by the height of the top of the jump as you are trying to place the front wheel on the peak/lip or downside of the jump.
Once your front wheel has cleared the peak you can push the bars down.
When your rear wheel reaches the top of the jump, you can "push" the handlebars away from you. (On a tabletop, you wont need to push your bars down or out as the bike will simply level out.)
Once the rear wheel starts to ride down the back of the jump, you can start pedalling again.
The Lift feels strange at first as you think you are going to loop out.
However, the front wheel begins to come down as soon as the rear wheel starts riding up the slope of the jump. The only way youre going to loop out is if you keep pulling up after you pass the lip.
Pumping
Cornering.
The subtle technique of "pumping" should be incorporated into all the methods of traversing jumps and is especially effective in the rhythm section of the track where it is hard to get a quick crank of the pedals in. When applied correctly, pumping the downside of a jump can generate tremendous speed. It is interesting to note that most of the heavier riders that are deceptively fast are pumping demons!
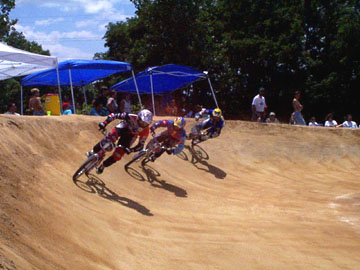
Almost all of todays BMX tracks have high banked hairpin turns. Most of these turns are paved for easy maintenance. This configuration (and clip-in pedals) has reduced the importance of cornering skills in BMX racing to a drag-race through the turns. However, there is still money to be made in the turns...
Weight distribution
Bad front-to-rear positioning on the bike can result in a "washout" or the "tuck-under" - both can be prevented with proper cornering technique.
A washout occurs when your front wheel slides too much and causes you to get squirrelly or wreck.
A tuck-under is the opposite: the front wheel digs too sharply and suddenly, causing you to be launched headfirst over the handlebars - the classic "high-side" wreck!
If you wash-out (need to move more weight forward to increase traction on the front tire) or experience tuck-under (move weight rearwards to reduce "bite"), but in general your outside leg should be about even with the seat, and you should be bending slightly forward at the waist.
Pedal position
On todays paved high-bermed turns, you should be pedalling as hard as possible when you are not turning at limits of traction.
Generally, if you are railing a turn, you should be pedalling though it.
If you are at the limits of traction, your outside pedal should be down and carrying most of your weight.
Your front-to-rear weight distribution is critical to maintaining your intended line.
The 4 basic "lines" on a standard hairpin turn.
1. "The Line" is shown in red.
Riders "railing" the turn will be able to carry the most speed through the turn, especially if the turn is steeply banked, and will have the highest exit speed.
2. The late turn is shown in green.
This is the line used to "block" pass the rider (who is railing the turn) in front of you.
If executed correctly, you should cut across the corner and arrive at the same point on the turn slightly ahead of the other rider and take his line away.
This "pimp move" will force the pimped rider to slow down slightly (or crash into you) and mess up his plans to jump the the next obstacle ahead.
Executing this move leaves both riders vulnerable to the early pivot line.
3. The early pivot is shown in blue.
This is a great surprise move where the leader is expecting the pimp move and is pedalling through the turn. This line requires cornering skills superior to the planned victim, but also is a great way to pass a pimp/pimpee move happening in front of you.
4. The shortest line is shown in yellow. This is the tightest, slowest turn which is very seldom an option unless a crash or obstacles prior to the turn have reduced your speed to where you do not need to brake to execute this turn.

Moving Violations. (NBL rule# 16.4)
Practice time.
A rider may not cause any part of his person or bicycle to come into contact with another riders person or bicycle during a race with the intention of impeding his progress so as to overtake him or cause him to be overtaken by another rider.
Any rider who leaves the track at any point during a race must reenter the track at the first available safe opportunity.
A rider may not cut the track to gain advantage over one or more other riders in a race.
Cutting the track occurs when a rider finishes a race without making a complete circuit of the race course.
Except when expressly directed to do so by an official, no rider may traverse the track in a backward direction either during a race or practice session.
A rider wishing to file a moving violation protest must raise his hand and remain in the designated area
at the finish until he is recognized by the appropriate official.
Walking and picking lines
Walk the track before practice. Pick three lines for EVERY feature on the track: jumps, berms, straights and turns.
Use your first three laps to try all three of those lines out. If you get more than three laps, mix and match, keeping all three lines in mind each time.
Pick your lines through the turns based on the obstacles before and after each turn so that for example you will have sufficient speed to clear a peaked double jump.
Decide which lines are the quickest and splice them together to build your optimum lap.
During the race, consciously decide before every obstacle which line you will take.
Having three choices for every obstacle isn't the total answer, but it does ensure that if you have to change your gameplan mid-race you will have some familiar lines to take.
Practice laps should be taken flat-out, just like you would in a race.
If you practice practicing often enough, chances are that picking and using alternate lines will become second nature to you.
Bike Setup.
The standard setup I'm about to discuss is specifically directed at the 20" BMX bike, although I am sure some of the information is applicable to Mini's and Cruiser (24") BMX bikes. Most Mini bikes have a maximum weight restriction and there are limited options in terms of parts to change the bike setup.
Wheels and tires
The most important issue is to have more traction on the front wheel than the back wheel (before taking rider weight/input into consideration.)
There are 2 factors involved, 1) tire footprint and 2) tread pattern/rubber compounds.
Tire footprint is influenced by the profile, size of the tire and it's air pressure. A good starting point is running a 1.75 on the back and a 2.00+ on the front for riders weighing over 140 pounds.
If they are of the same brand/pattern and inflated to the same air pressure, the rear end of your bike should start to lose traction before the front (a far more controllable/correctable situation.)
Your tires should be inflated to the max. stated on the sidewalls.
This reduces rolling resistance to a minimum and you should get better tread bite on a dry track (knobs will better resist rolling over) - and protect your rims from dings when you land hard. Check your tyre pressure every time you practice on the track.
If the track is spongy, wet, or dusty, reduce the air pressure in the front tyre only by ten psi for better traction (by increasing the footprint of that tire.)
Your rear wheel traction should be equal or less than your front wheel's. If this is not so, your front wheel will slide out before your rear one does and pitch you over the front end of your bike.
Never drop your rear tire pressure beneath that of your front tire.
The subject of which brand and pattern tire to use is a personal one - and new tires are being developed all the time. A safe bet is a the Comp III or Megabite or similar brand. A good set of tires needs to be mounted on wheels that spin smoothly and are reasonably straight. Buy a spoke wrench and spend some quality time with your wheels - they will love you for it.
Drivetrain
Freewheel: Keep it clean, and keep oil out of it. If you put the bike on a rack, tie the rear wheel so it doesn't spin while you drive, wearing out the freewheel prematurely.
Drivechain: Run a 3/32 chain if your sprockets and freewheel will accept it. The bigger the chain, the more power you lose rolling it around. Chains should be oiled with the same brand of oil each time, remove excess with a paper towel or rag.
When in doubt, replace the chain!
Adjust the chain to have about one half inch of total play at the tightest spot.
If it binds at any point, you are losing horsepower to the rear wheel!
Cranks. The basic rule is: For riders from 5'4" to 5'8" tall, 175mm; from 5'9 to 6'1", 180mm; above that, 185mm. You may have to adjust 5mm longer or shorter if your legs are long or short for your height. Basically, the longer the cranks, the more leverage you have, and therefore the more torque you can apply to the crankshaft. However, cranks which are too long for you will restrict your ability to "spin", so don't overdo the crank length!
Gear ratios is a huge subject. A good starting point for most tracks is 44/16, coupled with the correct length cranks. On a long, fast track you may find yourself overspinning and not reaching your top speed, you may need to run taller gearing (add teeth to front, reduce teeth at rear - or combination of both.) The cost of taller gearing and a higher top speed is slower accelleration (and slower gates!) Another way of picking up speed is to reduce your crank length and gain some extra revs. (at the cost of reduced leverage and probably accelleration.) On shorter, tighter tracks, accelleration may be the key ingredient to winning (at the cost of top speed) and so shorter gearing could be the way to go. If you really want to get nerdy, go to (external link to BMX Experts site) to get top speed index (rollout), effort index (gear ratio/crank length), and simple gear ratios (when you want to change ratios)
Frames and Ergonomics
Handlebar and stem adjustment: If your bike has a standard pro-size bar and stem combo, then start with your handlebars in the straight up and down position.
Ride it like this for a while.
Adjust the bars by rotating them either an inch or two backward, or forward and continue riding.
If your bars still feel too far forward after a lot of testing, your frame or stem is too long.
The reverse is true if the bars still feel too close.
Excessively laid-back or falling-forward bars will adversely affect the handling of the bike by shifting the riders weight distribution.
The width of the bars should be at least the width of your shoulders; narrower than this and you are losing leverage (and it may not be NBL legal.)
Seat adjustment: Now that the handlebars are adjusted correctly, you can adjust your seat height. Turn the bar through 90 degrees and adjust the seat so that the front of the seat is 1 inch lower than the handlebar grips. If the seat impedes your movement towards the back of the bike, lower the seat until your tail passes over the seat without "stretching" your legs while the pedals are in the level position.
Frame size: If you are using equipment and settings way-out from normal it is possible that you are riding the wrong size frame. For example, using an XXL stem on a standard-size bike to stretch out the top-tube may be an indication that you may need a larger frame. (Pro-size or XL aluminum machined stem should be okay.)
Grips, pedals, brakes and decals: There are so many options, you will need to try things, make the changes incrementally and honestly evaluate each change.
I have heard the comment, "If you get clip-ins, your feet won't slip off the pedals and tear up your shins like that!"
I see this as a classic case of using technology to mask bad riding technique.
If you you don't correct the source of the problem (using bad technique to compress jumps in my case), things will get ugly again when you progress to more advanced levels and techniques (like the "dead sailor" when you are speed-jumping.)
Incidentally, I have corrected the problem and my shins are healing nicely - and I am going faster, thank you!
Once your bike is set up correctly and maintained in race-ready condition, you should be more critical of yourself and less critical of your equipment.
Focus more on upgrading your rider skills than trick/slick/miracle parts, and you will get faster!
Do you honestly think clip-ins and an aluminum frame is going to boost you from last place to first place, especially if any one of the riders that beat you are using platform pedals and a chromoly frame? It is so easy to get caught up in the hi-tech wars and marketing campaigns, and lose focus on the rider aspects of BMX racing.
Disclaimer:
For those analytical thinkers, the information above will probably be helpful. For those talented, instinctive riders this may be too much information - and a load of B-S! I have found that a lot of experienced riders cannot synthesize what they are doing into words, so I want to document it while I am still a Rookie and it is fresh in my mind! Anyway, the information above is my interpretation of what works - use it at your own risk.
I welcome contributions (and corrections) to the BMX section. Please don't send anything that requires Plug-ins (eg. Shockwave) or downloaded software to view it - thanks!
If you wish to print a copy of this page, click on print-friendly BMX page, print, and then close the window. (I hope that saves you some ink!)
Use the Navigational hyperlinks below if your browser does not support HTML frames.
Home | Military | BMX | Bass Fishing | Links | Comments | Photo Album | Contact Me